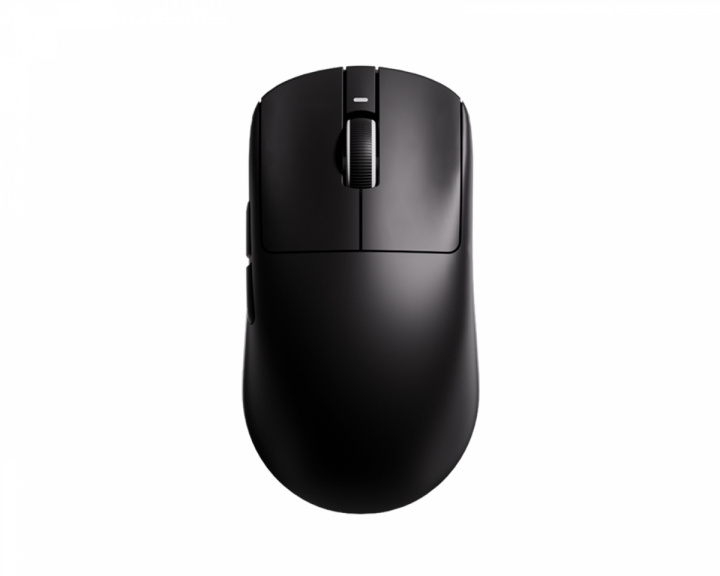
F1 Extreme has 3950 Ultra Sensor, TTC Side Switches, 200mAh battery & 35g weight
F1 Pro Max has 3950. Huano Side Switches, 500mAh battery & 50g weight
I'm currently using the F1 Pro Max with 1k polling rate and atk firmware max option, and the battery at least lasts like 4-5 days for me if charged 100%.
https://preview.redd.it/4pl5uu0trwkg1.png?width=1880&format=png&auto=webp&s=ea6e4f17c3233c9051f27676d07b0b1899c70b17
**Introduction & Context**
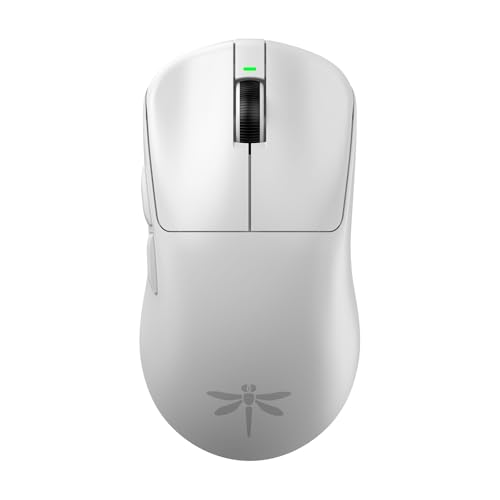
Happy Saturday [r/MouseReview](https://www.reddit.com/r/MouseReview/) . Today we are looking at something a bit different. This Saturday, we are reviewing the VGN Dragonfly F1 Pro Max.
I'm Ben, a second-year robotics engineering student and still learning. My goal isn't just to tell you if the mouse is "pretty," but to attempt to audit its construction. Today, we're going to measure tolerances, verify if the long-term performance matches the initial specs, and check how the engineering holds up after extensive use.
**Important Context:**
* **Sample Size & Condition:** I am analyzing two separate units of the F1 Pro Max to assess manufacturing variance over time. Please note that the macro photographs provided in this thread feature the older of the two units, which shows significant mechanical wear.
* **Long-Term Status & Modifications:** Because these units have been in active rotation for an extended period, the original packaging was discarded long ago (so we are skipping the unboxing). Furthermore, the stock PTFE skates on both units were replaced with aftermarket ESPTIGER skates after the first few weeks of use; therefore, stock skate friction cannot be measured in this review.
* **Independence:** Both units evaluated were purchased entirely out of my own pocket. No review samples, zero bias.
**TL;DR** An objectively capable 54g symmetrical mouse powered by a flawless PAW3395 sensor and Nordic MCU implementation. It offers excellent telemetry and premium Kailh Golden Black Mamba main clicks, though it is slightly hindered by long-term TTC Silver encoder degradation and a forward-biased center of mass due to its 500mAh battery placement. Originally an unbeatable budget king at $50, it remains a highly viable, top-tier performing option primarily optimized for Claw Grip users. Full engineering teardown, CoM analysis, and sensor telemetry graphs below!
(***Disclaimer:*** *I still have a* ***lot to learn*** *in this field. I am very open to constructive feedback, so if you spot any errors in my methodology or measurements, please let me know—I'm here to learn and improve!).*
https://preview.redd.it/730w2a4wrwkg1.jpg?width=4536&format=pjpg&auto=webp&s=9da2410741b37991a4ebe1699f12a00300ec6ec4
**Included Hardware & Accessories**
Although the physical packaging and original accessories are no longer in my possession, it is necessary to document the factory contents for reference. Out of the box, the VGN Dragonfly F1 Pro Max includes the mouse itself, a paracord-style braided cable (which provides sufficiently low drag for tethered use while charging), the standard 1000Hz wireless receiver along with its desk extension adapter, and a set of pre-cut grip tapes (color-matched to the shell: black grips for the black edition, white grips for the white edition). I do not recall the factory package including any additional replacement PTFE skates.
***Note on Polling Rate & Grips:*** *VGN sells their 4000Hz high-polling dongle as a separate upgrade. Since I did not purchase this accessory, all polling rate stability tests and sensor benchmarks in this review are strictly capped at 1000Hz. Additionally, because the factory grips were discarded long ago, I cannot measure their exact caliper thickness or evaluate their adhesive durability.*
https://preview.redd.it/ujyqf9i0swkg1.jpg?width=8889&format=pjpg&auto=webp&s=d341b6a8241d27fff9be1d0928169860d9017740
**Mass & Weight Distribution Analysis**
Regarding mass, VGN claims **55g**, albeit with a stated variance of **± 3g**. Furthermore, they note that the white edition weighs 1g more than other variants. My precision scale measured **54.02 ± 0.01g** (without skates). When fully equipped, the mass increases to **55.83 ± 0.01g**. This figure is the calculated mean of five separate weigh-ins to ensure statistical accuracy. This exceptionally low mass is achieved through specific shell thickness tolerances and internal structural simplicity, which will be detailed in the Teardown section.
***Note regarding weight:*** *The fully equipped measurement of 55.83* ± *0.01g was conducted using aftermarket* ***ESPTIGER Ice V2*** *skates, as the stock skates are no longer available on this unit.*
**Center of Mass (CoM) Analysis**
Accurately calculating the center of mass (CoM) for complex geometries typically requires exact 3D CAD models. However, empirical experimental methods can provide a close approximation. For this review, I utilized a **minimal-surface-area fulcrum** to balance the device. Once equilibrium is achieved, the CoM aligns vertically with the contact point. While not perfectly exact, it yields a highly accurate operational approximation.
In the VGN Dragonfly F1, the center of mass is located near the **PAW3395 sensor**, with a distinct **forward bias**. A front-heavy weight distribution means the device carries more rotational inertia towards the main clicks, contrasting sharply with the Logitech G Pro X Superlight 2, which exhibited a slight rearward bias. Subjectively, a forward-tending CoM can feel slightly unconventional, as rear-heavy distributions are often preferred for strict tracking control; however, in practical application, this forward bias is highly manageable on this unit. The Teardown section will reveal the exact internal layout causing this shift (spoiler: it is directly tied to the **battery placement**).
**Dimensional Accuracy & Manufacturing Tolerances**
Regarding physical dimensions, VGN's official specifications dictate a height of 37.6mm, a width of 63.5mm, and a length of 121.2mm. Utilizing **digital calipers** and following the same multiple-measurement methodology used for mass, my empirical results are as follows:
* **Height:** 37.12 ± 0.1mm (1.28% smaller than stated).
* **Width:** 62.42 ± 0.1mm (1.70% smaller than stated).
* **Length:** 121.4 ± 0.1mm (0.17% larger than stated).
While these dimensional deviations are virtually imperceptible in practical use, they serve as empirical data points reflecting the **manufacturing tolerances** at this price bracket. Additional useful metrics include the **effective grip width**, measuring 57.97 ± 0.1mm, and a **front button height** (M1/M2) of 12.83 ± 0.1mm. Furthermore, the maximum hump height aligns perfectly with the absolute maximum height of 37.12 ± 0.1mm.
**Shape, Symmetry & Structural Alignment**
Regarding the main button symmetry, the structural alignment is excellent, with **highly consistent panel gaps** across the entire front fascia. Analyzing the overall shape, VGN has opted for **strict bilateral symmetry**, which theoretically assists in lateral CoM stabilization. While shape preference is inherently subjective, the dimensional data provides objective context: the **maximum width** (previously measured at 62.42mm) is located at the rear flare, whereas the **front width** narrows to 60.97 ± 0.1mm, confirming a distinct **frontal taper**.
https://preview.redd.it/yjsmjp62swkg1.jpg?width=4792&format=pjpg&auto=webp&s=39ca9c79a5797a5209a1d6323c6f2adb81dc8066
**Front Fascia & Main Buttons**
Moving into the visual and structural analysis, we start with the front fascia. Here we find the primary **M1 and M2 buttons**. Positioned low and perfectly centered is the **Type-C port**, utilized for both battery charging and tethered operation. For practical verification, I tested a generic Type-C cable to confirm clearance compatibility; the port housing accommodates standard aftermarket cables perfectly, which is excellent for longevity if the stock cable is lost or upgraded.
The main click geometry relies on a trapezoidal shape with aggressively radiused edges. The finger contact area features a subtle concave depression (**comfort grooves**), ensuring the fingers remain locked into position. It may be hard to capture in the macro photographs, but this specific area shows visible long-term wear, developing a distinct **ABS shine** that is absent from the rest of the shell.
**Scroll Wheel & Encoder Degradation**
We can also observe the scroll wheel, featuring a white outer ring and a black inner core. The wheel steps (**tactility**) are well-defined, and the middle mouse button (M3) actuation force is relatively low.
***Note regarding the scroll wheel:*** The encoder has exhibited reliability issues over the years. Specifically, it developed **scroll-jump** (e.g., scrolling down occasionally registers an upward input). Applying isopropyl alcohol to the encoder provided a temporary fix, but it is a noticeable long-term degradation point.
**Side Profile & Button Actuation**
Examining the side profile, the secondary (side) buttons protrude roughly **3mm** from the main chassis and feel remarkably solid. These side buttons exhibit virtually zero **pre-travel**, though there is a slight degree of **post-travel** (this is a subjective assessment, as measuring side-button travel with calibrated tools is exceptionally difficult). From this angle, we can also verify the base flatness; both the front and rear sections sit perfectly level on a single horizontal plane with no pitch inclination.
**Bottom Plate & Skate Layout**
On the bottom plate, we find the skate layout (again, these are aftermarket **ESPTIGER**, not stock). The front utilizes a half-moon surface area, while the rear features an identical but scaled-up geometry. Additionally, a small **skate ring** surrounds the sensor perimeter. This specific layout is designed to balance glide and precision. I will omit subjective glide testing since these are not factory skates, but if anyone is interested in how this specific ESPTIGER combo performs, please let me know in the comments.
**Coating & Long-Term Wear**
At the rear of the shell, there was originally a small gunmetal dragonfly logo. However, over the years, this decal has completely faded. This is an interesting data point regarding **long-term durability** rather than a strict negative; this unit has seen genuine, intensive use, and it is expected for printed elements to wear off under such conditions.
Regarding the surface **coating**, it has a slightly waxy texture, meaning it lacks premium anti-slip properties. I highly recommend using **grip tapes** with this mouse; in fact, I applied them within the first few weeks of use, even for standard productivity tasks.
https://preview.redd.it/lpl66ac3swkg1.jpg?width=5760&format=pjpg&auto=webp&s=03c4d5575545e2a5ac491ea7c9d05ae96e30b1b5
**Physical Integrity, Skates, and Clicks Analysis**
**Structural Rigidity & Shell Tolerances** Regarding structural integrity, applying direct pressure to the primary grip points reveals **minor shell flex** on the F1 Pro Max. However, this is not perceptible during standard operation, as it requires force exceeding normal grip pressure. Furthermore, there is **no noticeable creaking**, either laterally or across the base-to-hump axis. The flex at the grip points is likely due to the material thickness in that specific area, a hypothesis I will confirm during the Teardown section.
If we test for rattle by shaking the mouse near the ear, a **faint sound is audible**, which likely originates from the sensor lens. This is an interesting technical data point, but again, it is entirely imperceptible during practical use.
**Main Button Telemetry & Mounting**
Resting the fingers on the primary clicks (M1/M2) and applying lateral pressure reveals noticeable **horizontal wobble** and slight creaking. This occurs because the click panels are coupled to the chassis using only a **single screw**, unlike the dual-screw mounting system found on the Logitech G Pro X Superlight 2. A single-point mount inherently permits more rotational variance on the horizontal plane than a dual-point mount.
**Ergonomics & Switch Specifications**
Ergonomically, this mouse geometry is optimized for a **Claw Grip**. However, as a primary Palm Grip user, I have not experienced any discomfort over long-term use.
The primary switches are the **Kailh Golden Black Mamba**. According to the manufacturer's technical data, these switches are rated for a **90-million click lifespan**, with an actuation travel of **0.3 ± 0.2mm** and an actuation force of **60 ± 5gf**. The acoustic profile is of medium volume; they are neither overly loud nor silent. Additionally, the left click (M1) produces a slightly higher-pitched sound than the right click (M2). A similar acoustic variance is present in the side buttons, with the front button sounding higher-pitched than the rear.
***Note regarding audio:*** *Links to the audio test for the clicks is provided in the comments section for those interested in the acoustic profile:*
***Note regarding skates:*** *Skates are not evaluated in this section as they are aftermarket replacements, as established in the* *introduction.*
https://preview.redd.it/428dgii6swkg1.png?width=2560&format=png&auto=webp&s=7faa22e60ff4c3e399a605a10202d94a05ceb273
**Software & Configuration (VGN Hub)**
Before proceeding to the sensor benchmarks, a brief overview of the software utility and its configuration parameters is necessary. I will keep this concise, but this context is essential for a specific telemetry test detailed in the subsequent section.
**Main Interface & UI Evolution**
Starting with the main interface (pictured above), the software displays the connected device, allowing access to its settings with a single click. As a long-term user, I distinctly remember that when I first purchased this unit years ago, this interface was **vastly more primitive**. I am not even certain it was fully localized in English at the time, and any existing translation was **plagued with errors**.
**Key Settings & DPI Configuration**
Clicking on the device opens the **Key Settings** page. From here, we can remap buttons—such as assigning the side buttons to cycle CPI, or binding M2, or M3 to media controls (brightness, volume) or system commands (refresh). Additionally, in the top left corner, we find a **battery level indicator** and the current **connection method** readout.
In the **DPI Setting** tab, there are **4 default CPI profiles**, with the capacity to expand **up to 8**. This menu allows us to configure the specific CPI values for each profile, assign a corresponding LED indicator color, and even adjust **independent X/Y axis CPI scaling**.
**Macro Setting**
The **Macro Setting** tab, as the name implies, functions as a standard macro recording tool, allowing sequential inputs to be bound to a specific mouse button.
**Parameter Tab (Sensor Telemetry)**
The **Parameter** tab is, from an analytical standpoint, the most interesting. It grants access to critical sensor functions:
* **Polling Rate:** Adjusts the transmission frequency (Hz) and, consequently, the sampling period of the mouse. The **4000Hz option is locked** as I do not possess the required 4K dongle.
* **LOD Height:** Lift-off distance, selectable between **1mm and 2mm**. \*(\****Note:*** *I cannot quantitatively verify this parameter yet, as I am still researching a reliable methodology to measure LOD with strict precision).*
* **Move Sync (Motion Sync):** Attempts to smooth out cursor movement by synchronizing sensor polls with USB polls, though this inherently introduces a **slight degree of motion delay**.
* **Straight Line (Angle Snapping):** An algorithm designed to force **linear trajectories**. This will be empirically tested in the subsequent section.
* **Wavy Line (Ripple Control):** Purportedly attempts to correct wavy jitter during high-speed tracking. I have conducted extensive A/B testing with this parameter toggled on and off; in all scenarios, the telemetry results were **identical**, rendering this feature **functionally unnoticeable** in my testing.
* **Sensor Sampling Rate:** Adjusts the internal sensor capture frequency.
* **Key Anti-Shake Delay:** **Debounce time** adjustment to mitigate double-clicking issues. As I learned in my engineering degree, hardware debouncing is traditionally addressed by adding a **passive low-pass filter** (a resistor in series and a capacitor in parallel) at the switch input. Additionally, bouncing can be eliminated by utilizing switches that exhibit inherent **hysteresis**, or directly through **software filtering algorithms**. This specific parameter utilizes the latter method, allowing us to digitally tune the debounce delay at the MCU level.
* **Sleep Time Setting:** Configures the idle timer for battery conservation.
* **DPI Lighting Effect:** Toggles the LED indicator behavior.
**Onboard Memory & Web Hub Optimization**
Additionally, this Dragonfly F1 features **true onboard memory**. Profiles can be toggled via the physical button on the bottom plate, or parameters can be saved via the software, which can then be completely closed. This **optimizes system RAM usage** and eliminates unnecessary background processes that could impact gaming performance. I must also mention that VGN offers a **web-based configuration hub**, which I highly recommend if you prefer not to install standalone software on your machine.
Overall, it is a highly comprehensive software suite providing all the necessary tools to configure the hardware. The most commendable aspect is the vast improvement in UI design and English localization over the years; it is now vastly more comfortable and functional in its current state.
[W\/O Straight Line Correction](https://preview.redd.it/2pkk9jp8swkg1.png?width=2560&format=png&auto=webp&s=29bd5924dd19456dd22891cf401ade340df57e77)
[Straight Line Correction](https://preview.redd.it/b0qfc209swkg1.png?width=2560&format=png&auto=webp&s=07e28860c16ac4eac14c11b6dae0de639d1a72f3)
[500Hz 791CPI](https://preview.redd.it/8dbj84j9swkg1.png?width=2560&format=png&auto=webp&s=bf6cc5a13cfcf293e9a612156bc5a9ec888461ac)
[500Hz 1596CPI](https://preview.redd.it/yi9rqbq9swkg1.png?width=2560&format=png&auto=webp&s=42416e643572ec609063d970e1dc4ae05a20ef04)
[1000Hz 791CPI](https://preview.redd.it/vswp3gz9swkg1.png?width=2560&format=png&auto=webp&s=151742ddd4900c3bb9ac5d086b8807e70651a062)
[1000Hz 1596CPI](https://preview.redd.it/khsh017aswkg1.png?width=2560&format=png&auto=webp&s=bab19a930ee75cb5e80dbc71c6163efa2d5fcdb7)
[Raw Tracking](https://preview.redd.it/aovlnwfaswkg1.png?width=2560&format=png&auto=webp&s=a8cc2414d7db67d27ffb84a58683a81fd3f96397)
**Sensor Telemetry & Performance Benchmarks**
The Dragonfly F1 Pro Max utilizes a **PixArt PAW3395 sensor**. According to its technical datasheet (a link will be provided at the end of the review for those interested), it features a maximum of **26,000 CPI**, a tracking speed of **650 IPS**, and an acceleration of **50G**. These last two parameters are achieved in High Performance Mode, which I assume corresponds to the **Esports Mode** within the VGN software. For these benchmarks, **Motion Sync was disabled**, the mouse was set to Esports Mode, and all testing was conducted **wirelessly**.
***Note:*** *All telemetry and tracking tests were performed using* ***MouseTester v1.6.1 (Amit's branch)****.*
**CPI Deviation Analysis**
We will establish our baseline by calculating the CPI deviation. This was calculated for both theoretical **800 CPI** and **1600 CPI** targets, as both will be utilized in the graphs. To conduct this test, the mouse must be moved horizontally exactly **10cm**. To maximize precision, the measurement was performed five times, and the mean average was calculated. The results for the theoretical 800 CPI target yielded an actual **791 CPI**, representing a deviation of **1.125%**. For the theoretical 1600 CPI target, we observed an actual **1596 CPI**, a deviation of **0.25%**. In practical terms, this means the sensor tracking is **slightly slower** than the advertised specifications. However, these results fall well within **acceptable manufacturing tolerances** and are completely normal.
**Testing Methodology Context**
Before proceeding, all non-polling rate tests were conducted at **1000Hz**. The CPI was set to 800 within the VGN Hub, while the actual calculated value of **791 CPI** was inputted into the testing software to ensure maximum precision and establish an accurate baseline. However, as you will see below, the polling rate tests were conducted at both **500Hz and 1000Hz**, across both 800 and 1600 CPI targets, to provide a more comprehensive data set.
**Straight Line (Angle Snapping) Algorithm Test**
We begin by testing the Straight Line function. To evaluate this, I attempted to draw stair-steps, a downward diagonal line, and a straight horizontal line to the right. Comparing the two graphs, we can observe the algorithm in action. Notably, it is not aggressively intrusive and remains quite permissive. Nevertheless, the trajectory correction is visible, overriding the natural micro-movements generated by the human hand when attempting precision tasks. This confirms that with the function disabled, there is absolutely zero inherent angle snapping; the diagonals, stair-steps, and straight lines follow the exact natural, uncorrected path of the hand, preserving all human error. All subsequent tests were performed with this function completely disabled.
**Polling Rate Stability (500Hz Target)**
Moving to the 500Hz polling rate telemetry, tested at both the calculated 791 CPI and 1596 CPI values. Here, we are looking for a stable line hovering around **2ms**, as the sampling period is the inverse of the frequency. Both graphs were evaluated over an interval of 1000 data points. As seen in the 791 CPI graph, the polling rate maintains a **highly stable 2ms line**. However, at 1596 CPI, a visual difference is immediately apparent. While the line remains stable in both, it exhibits **slightly more variance and deviation** at the higher CPI. These graphs provide insight into the implementation quality of the **Nordic 52840 MCU**. It is crucial to remember that this operates as a coupled system; if one component fails, the entire system's integrity is compromised. Ultimately, while this slight variance is **imperceptible to human sensation**, it is highly relevant for strict technical evaluation.
**Polling Rate Stability (1000Hz Target)**
For the 1000Hz tests, which should theoretically yield a stable line around 1ms, the exact same methodology was applied. In this instance, the graph for 791 CPI is not quite as rigidly stable as its 500Hz counterpart. Curiously, however, the 1596 CPI line at 1000Hz demonstrates excellent stability. I must reiterate that these micro-deviations are imperceptible in human use; a true hardware failure would only be indicated by highly erratic line plotting or complete polling collapse at specific intervals.
**Raw Tracking Assessment**
We now evaluate **Raw Tracking**, conducted by swiping the mouse rapidly from side to side. We are looking for the smoothest possible curves, free from tracking breaks, severe drop-offs, or drastic artificial spikes. As observed in the resulting graph, both curves are **exceptionally smooth**, lacking any severe peaks or interruptions. The individual data points plot very closely to the theoretical curves, acting as further evidence of **excellent firmware implementation** and high-quality component integration.
**Lift-Off Distance (LOD)**
Regarding LOD, as previously mentioned, I do not yet have the instrumentation to measure this with strict empirical accuracy. The software allows selection between **1mm and 2mm** presets. Based purely on subjective perception for this specific parameter, I can confirm a **noticeable tracking difference** between the two modes, though I cannot quantitatively verify if they hit exactly 1.0mm or 2.0mm.
**Telemetry Conclusion**
Collectively, these diagnostic tests provide a strong empirical argument that this mouse features an **excellent microcontroller implementation**, working in seamless conjunction with the **PAW3395 sensor** and the overarching hardware architecture.
***Note regarding polling outliers:*** *Any isolated data points present above or below the main trendline in the polling graphs are typical* ***OS-level USB interrupt delays*** *(Windows background processing), rather than actual hardware or MCU dropouts.*
https://preview.redd.it/ok1e34agswkg1.jpg?width=4536&format=pjpg&auto=webp&s=d063f26ec91865a704842b611a3620cfe0d1f631
**Hardware Teardown & Internal Structural Analysis**
**Disassembly & Shell Access**
The first step in the teardown process requires the removal of the PTFE skates to expose the chassis fasteners. Underneath, we find four standard **Phillips-head screws** (two at the front, two at the rear).
***Note:*** *It is highly recommended—if not strictly mandatory—to have a set of replacement aftermarket skates on hand before attempting this, as removing the original skates usually destroys their adhesive layer and ruins their glide.*
Once the screws are extracted, a plastic spudger must be used to carefully disengage the structural clips securing the base plate. In this design, there are only **two large lateral clips**. Extreme caution is required when separating the top shell from the base, as a very delicate **ribbon cable (ZIF connector)** connects the top daughterboard to the main PCB. To disconnect it safely, simply flip up the retaining latch on the socket, and the cable slides out cleanly.
https://preview.redd.it/q774blnhswkg1.jpg?width=6804&format=pjpg&auto=webp&s=a085bb9a832d9f57d840d8ee7769be6f649f6ae7
**Mainboard (PCB) & Microcontroller Architecture**
On the main PCB, we find the PixArt **PAW3395 sensor** alongside the **Nordic 52840 MCU** (the latter is not clearly visible in the macro shots due to the microscopic laser etching on the IC package). This Nordic chip utilizes a 32-bit ARM Cortex-M4 processor capable of operating at clock speeds of **64MHz**. Additionally, it features **1MB of Flash memory and 256KB of RAM**, a portion of which is allocated to the onboard memory managed via the software. Analyzing the board, all traces and solder joints appear remarkably clean and secure.
**PCB Dimensions & Underside Components**
Removing the battery and the ribbon cable allows for the complete extraction of the mainboard from the bottom shell, exposing it as shown in the images above. The PCB is secured by three screws in total: two securing the battery cradle assembly and one solitary screw at the front. The underside of the PCB houses the sensor lens array, the physical power slider, the hardware CPI cycle button, and the front-mounted Type-C charging port. Using precision calipers, I measured the mainboard thickness at **0.7 ± 0.1mm**, a very thin profile that significantly contributes to overall weight reduction.
https://preview.redd.it/nj2xja4jswkg1.jpg?width=6804&format=pjpg&auto=webp&s=67d5aff77e464e9db522e60718e78996c979166b
**Primary Switches & Encoder Degradation**
Regarding the primary microswitches, as previously noted, VGN opted for the **Kailh Golden Black Mamba** (subjectively, a visually stunning switch design). The M3 (middle click) is actuated by a standard, unbranded mechanical tactile switch; there are no legible manufacturer markings on its housing.
Moving to the scroll wheel encoder, we find a standard **TTC Silver encoder (non-dustproof variant)**. The lack of a dustproof core is the direct engineering cause of the scroll-jump issues I experienced over the years, as debris easily compromises the mechanical contacts inside the encoder wheel.
https://preview.redd.it/s88d186kswkg1.jpg?width=4536&format=pjpg&auto=webp&s=bd6f483652a0b23a00202e9f2a337fc056fe9723
**Daughterboard & Side Buttons**
Unscrewing the three fasteners holding the top assembly reveals the daughterboard, which connects to the main PCB via the aforementioned ribbon cable. This board houses the two side button switches, which I can confirm are **Huano White Dots**. As seen in the macro shots, this small PCB is aggressively perforated (swiss-cheesed) to shave off as much weight as structurally possible. Its thickness matches the mainboard at exactly **0.7 ± 0.1mm**.
https://preview.redd.it/osm9fd7lswkg1.jpg?width=4536&format=pjpg&auto=webp&s=b231ca6650e5d6b52777011c0ab7692120e75cc2
**Battery Specifications & Center of Mass (CoM)**
The battery connector unplugs effortlessly. Examining the cell, it is rated at **500mAh** with a nominal voltage of **3.7V**. This specific component dictates the sole difference between the standard "Pro" and the "Pro Max" versions of this mouse; the sensor and MCU specifications remain completely identical across both SKUs, only the battery capacity changes.
Looking at the battery's factory placement, the mystery behind the forward-biased Center of Mass (CoM) analyzed earlier is instantly solved. The battery placement **tends more towards the front section** of the chassis rather than being mounted all the way at the rear. It represents a massive portion of the total mass, weighing in at **10.20 ± 0.01g** (which accounts for exactly **18.8% of the total mouse weight**). Interestingly, users could theoretically adjust the CoM to be more rear-centered by ungluing the battery and re-securing it further back on its plastic cradle.
https://preview.redd.it/hum9062mswkg1.jpg?width=4536&format=pjpg&auto=webp&s=be5ce2b8054280b07877c0e6257670dec4619149
**Shell Thickness & Structural Engineering**
Examining the upper shell (both exterior and interior views), we can compare its engineering philosophy directly to the Logitech G Pro X Superlight 2. VGN has clearly opted for a vastly simpler internal endoskeleton design. Caliper measurements of the shell walls reveal a thickness of **1.1 ± 0.1mm at the primary lateral grip zones**, tapering down to **1.0 ± 0.1mm** in less stressed areas like the front and rear flares. When isolated, the plastic shell exhibits noticeable flex at the grip points and the rear; however, once fully assembled and screwed into the baseplate, the structural tension prevents this flex from translating into real-world use.
**Main Button Mounting System**
Finally, examining the mechanical plungers for the M1 and M2 clicks (shown in the images), we can empirically explain the horizontal wobble noted in the physical analysis section. The click panels are mounted and tensioned by only a **single centralized screw**. This single-point mounting architecture inherently allows for more horizontal rotational play compared to a dual-screw tensioning system.
https://preview.redd.it/6765akboswkg1.jpg?width=4032&format=pjpg&auto=webp&s=9ba5ea8e6cd28e49d8ff7e1bac8b6b3d119fcbd1
**Conclusion & Final Thoughts**
**Hardware Potential & Areas for Improvement**
As discussed throughout this comprehensive review, the **VGN Dragonfly F1 Pro Max** objectively has a lot to offer. It implements a **highly capable microcontroller** working in tandem with a **top-tier sensor**, alongside several notable extra software features.
Admittedly, certain engineering details could be improved. A slight increase in **shell thickness**, a factory redistribution of the **Center of Mass (CoM)**, or simply utilizing a **dustproof encoder** (such as the TTC Gold Dustproof) would elevate this mouse significantly.
**Objective Pros & Cons**
With all these technical details in mind, we can summarize the device with an objective list of pros and cons:
**Pros:**
* **Excellent Telemetry:** The **Nordic MCU** and **PAW3395** integration provides incredibly stable polling and smooth tracking.
* **Ultra-Lightweight:** At **55.83g**, the mass-to-performance ratio is outstanding.
* **Premium Main Clicks:** The **Kailh Golden Black Mamba** switches offer a great tactile feel and a **90M click lifespan**.
* **Versatile Software:** Features true **onboard memory**, customizable debounce times, and a convenient **web-based hub**.
* **Value:** Originally priced at **$49.99**, it offered top-tier specs for a fraction of the cost of mainstream flagships.
**Cons:**
* **Encoder Degradation:** The **non-dustproof TTC Silver** encoder is highly prone to developing scroll-jump issues over time.
* **Forward-Biased CoM:** The **500mAh battery** placement makes the mouse slightly front-heavy out of the box.
* **Coating Durability:** The surface lacks premium grip and develops visible **ABS shine** after heavy long-term use (grip tape is highly recommended).
**Target Audience & Current Market Value**
This mouse is primarily targeted at **gaming enthusiasts**; however, given its price point, if the shape and size suit your hand, it is perfectly viable for any use case, as I have demonstrated throughout its lifespan. Regarding the shape, I am a primary **palm grip user** and find it very comfortable, although its geometry is inherently optimized for **claw grip**.
Considering its original MSRP of **$49.99**, it is a highly compelling piece of hardware for those on a strict budget. However, unless I am mistaken, this specific unit is currently **discontinued** on the official website. It can still be sourced through AliExpress for around **$67.20** (at least in my country).
**Closing Remarks & Disclaimer**
If you have made it this far, thank you for reading this extensive review. For those interested in examining the teardown and macro shots more closely, **I have provided a link in the comments section containing all images in full, uncompressed resolution**. If you have any doubts, questions, or have spotted any technical errors in my telemetry, please let me know in the comments or via DM.
***Disclaimer:*** *As an engineering student continually refining my testing methodology, I am completely open to constructive criticism and genuinely eager to learn and improve my hardware analysis work.*
As promised throughout the review, for those who want to hear the acoustic profile of the switches or examine the PCB and shell tolerances in detail, I have provided the raw audio files and the uncompressed, high-resolution macro photographs below.
**High-Resolution Teardown & Macro Gallery:**
* **Imgur Album:** [https://imgur.com/a/vgn-dragonfly-f1-pro-max-kz05tYl](https://imgur.com/a/vgn-dragonfly-f1-pro-max-kz05tYl)
**Switch Acoustic Profiles (Sound Tests):**
* **Main Clicks (M1/M2 - Kailh Golden Black Mamba):** [https://audio.com/ben-reviews/audio/vgn-dragonfly-f1-pro-max-m1-m2](https://audio.com/ben-reviews/audio/vgn-dragonfly-f1-pro-max-m1-m2)
* **Middle Click (M3 - Unbranded Tactile):** [https://audio.com/ben-reviews/audio/vgn-dragonfly-f1-pro-max-m3](https://audio.com/ben-reviews/audio/vgn-dragonfly-f1-pro-max-m3)
* **Side Buttons (Huano White Dots):** [https://audio.com/ben-reviews/audio/vgn-dragonfly-f1-pro-max-side](https://audio.com/ben-reviews/audio/vgn-dragonfly-f1-pro-max-side)
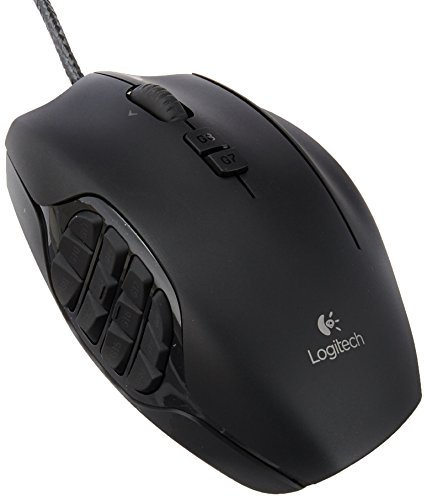
Thanks for the post, I just bought one for a traveling mouse. My Logitech G604 is feeling pretty heavy these days and is having double click issues. I have a VGN Dragonfly F1 Pro as my primary gaming mouse for my desktop at 49 Gram, but this should be almost as good at half the price.
I use the VGN Dragonfly F1 Pro, recommending it because it has almost the same grip as the G305 which was my previous mouse but it's better in literally every way. You do not need an 8k polling rate mouse.
The sensor difference is irrelevant(without regard to sensor placement). The MCU update however is probably more significant. But the clicks/scroll on the Hyperlight are pretty nice. How are the clicks on the F1V2?
X2H Mini will feel very similar, IMO If you really don't like the Scyrox hump, I feel like you won't like that either.
X2 Crazylight Mini could be a good fit. Mchose L7 is even smaller, but not the + models.
Sora v2 is only slightly smaller than the Scyrox, but the hump feels less rounded and a little less intrusive IMO.
OP1 could work well for you, but it will feel noticeably narrower than the other mice you have tried so far.
Atlantis Mini 4k is a dated mouse relative to all the new tech out there, but they can be found for pretty cheap, and it's a pretty safe, smaller claw-style mouse that I personally used for a long time.
Lamzu Maya (not X) definitely feels flatter than the Superlight but still provides that versatile ambi feel. Most of the other mice listed are somewhat rear-humped, claw-focused mice.
The sensor placement in the F1 isn't a big deal. The F1 is actually more in line with mice like the GPX and the VV3 than the Hyperlight is. The Hyperlight sensor is abnormally forward for its size compared to many mainstream mice. It isn't worth avoiding if the shape is the right fit for you. A more forward sensor may feel like the mouse plays at a slightly higher sensitivity, but it's nothing a little tweak in game settings can't fix if you're so inclined.
There is a lot of discussion about how it can affect lateral tracking or flicking, because we move our mouse on an arc, not in a straight line horizontally, but so many other factors influence that like hand placement and sensor placement relative to the mouse's COG, etc., that isolating sensor placement like it's being compared in a vacuum to other mice is not relevant, IMO.
Top Gaming Mice on Reddit
1
Logitech G
G600 MMO Gaming Mouse
73% positive of 694 users
Customizable MMO workhorse, durable, but discontinued and pricey.
 Adnan_Kh4n